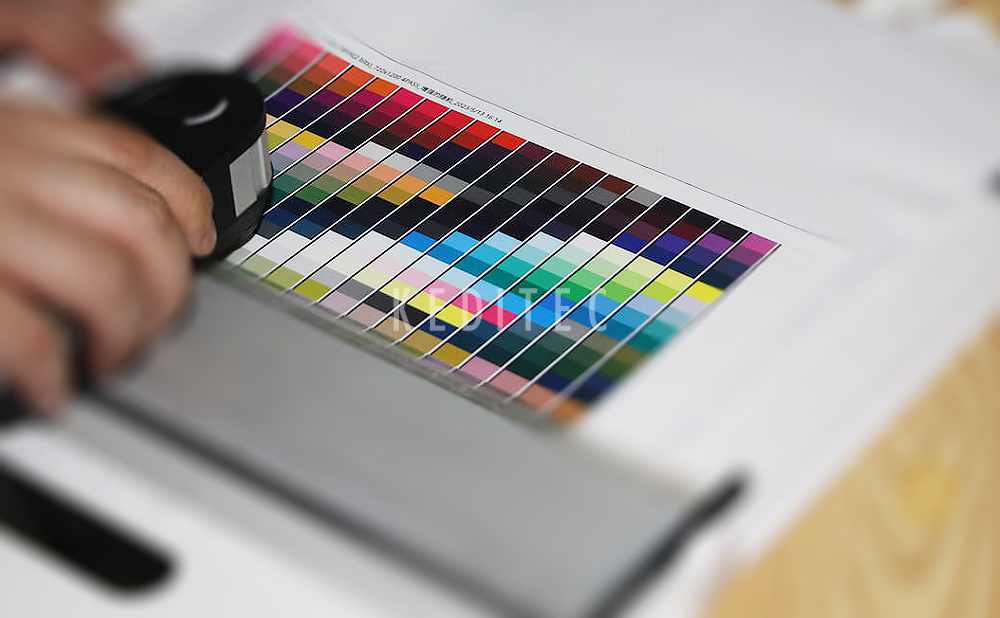
When you purchase printers and consumables from Keditec, there’s one particularly convenient aspect – the factory will directly adjust the curves for you, so you can start using the printer right out of the box. This means novice users don’t have to figure out complex parameters on their own, and for business owners engaged in mass production, it saves a lot of debugging time. However, having a better understanding of curves will make you more prepared when facing special printing requirements and help you further improve the quality of printed patterns. Today, we’ll explain DTF printer curves in detail from basic concepts to practical operations, so you can easily master this core technical point after reading.
1. What Exactly is a DTF Printer Curve? A One-Sentence Explanation
The “curve” mentioned in DTF printers is actually the ICC (International Color Consortium) printing curve. In simple terms, it’s a “color translation manual” – it converts the CMYK color data in design files into “ink output instructions” that the printer can understand.
Let’s take a simple example: when you select a “pure red” color in design software, the curve will tell the printer exactly how much cyan, magenta, yellow, and black ink to spray respectively, and how to mix and match them, so that the red color printed on the DTF film is almost identical to the one in your design. Different curves correspond to different ink ratios and spray intensities, which naturally result in different final printing effects.
It’s important to note here that a curve is not a “one-size-fits-all template”. It must be compatible with the printer model, ink type, and DTF film material. Take Keditec printers, for instance. If you switch to non-original white ink or color ink, even if you have the factory-preset curve, you still need to make slight adjustments. If you change from glossy DTF film to matte DTF film, the curve parameters also need to be adjusted accordingly; otherwise, the printing effect will definitely be compromised.

2. Why Are Curves So Important for DTF Printing? These 3 Roles Are Indispensable
Many people consider curves as just an “auxiliary setting” that can be optional. In fact, curves directly determine the quality of the printing effect. Specifically, they play three key roles:
2.1 Resolve Color Deviations and Turn “On-Screen Colors” into “On-Paper Colors”
The colors in design files are “digital ideal colors”. However, during actual printing, factors such as ink concentration, the speed at which DTF film absorbs ink, and the ink output precision of the print head can all cause the printed colors to “distort”. For example, without curve adjustment, the “sky blue” you want might end up printed as a dull “grayish blue”, and “orange” might be either too reddish or too yellowish, looking off in every way.
A suitable curve can help compensate for these deviations. For example, if the magenta concentration of a certain type of Keditec ink is slightly high, the curve will automatically reduce the magenta ink output. If the matte DTF film absorbs ink slowly, the curve will adjust the interval between ink sprays to prevent colors from piling up and appearing dark. In the end, the printed pattern can be almost identical to the one you designed.
2.2 Optimize Ink Usage to Balance Effect and Cost
The most expensive parts of DTF printing are color ink and white ink, especially white ink, which is not cheap. When the curve is properly adjusted, it can not only ensure the printing effect but also save on consumable costs. For example, when printing transfer patterns on light-colored fabrics, the curve will control the thickness of the white ink base – it needs to be thick enough to cover the fabric color while not being sprayed excessively to avoid waste. When printing dark-colored patterns, the curve will adjust the order of color ink overlapping to prevent ink from being sprayed too much and blurring the pattern.
On the contrary, if the curve is not properly adjusted, either the white ink will be insufficient to cover the base color, or the color ink will be too much leading to smudging. This not only results in unusable printed products but also wastes consumables, which is very uneconomical.
2.3 Ensure Consistent Colors in Batch Printing and Avoid “Batch Color Differences”
For users engaged in mass production such as custom clothing and gift processing, curves are even more of a “lifesaver” as they ensure consistent colors of patterns in each batch. Without a fixed curve, printing the same design today and tomorrow may result in different colors due to small issues like temperature changes (which affect ink viscosity) or slight wear of the print head. However, the preset curves of Keditec lock the ink output parameters suitable for its equipment. Even with minor external interferences, the preset compensation mechanism can maintain the printing effect, preventing product returns from customers due to “batch color differences”.
3. How to Select and Use DTF Printer Curves? Get Started in 4 Steps

With the preset curves provided by the Keditec factory, most basic printing needs can be met. But to handle more complex scenarios, you need to master the skills of “selecting correctly, using correctly, and adjusting correctly”. Ordinary users can follow these 4 steps:
3.1 Prioritize the “Original Matching Curve” Provided by the Factory; Don’t Randomly Download Universal Curves from the Internet
The curves provided by the Keditec factory are the “optimal combination” developed through repeated debugging based on their printers, original ink, and recommended DTF film, eliminating the need for you to start from scratch. It’s crucial to emphasize here: never randomly download “universal curves” from the internet! Most of these curves are created by netizens and are not compatible with your equipment and consumables. At best, they will lead to inaccurate colors; at worst, they may clog the print head due to incorrect ink output settings. For example, if a curve causes excessive white ink output, it can easily accumulate and solidify in the print head, making cleaning extremely difficult.
If you really need to switch to non-original consumables, it’s best to contact Keditec’s technical support and ask them to adjust the parameters based on the original curve, rather than directly replacing it with an unfamiliar curve.
3.2 Switch Curves According to Printing Scenarios; Don’t “Stick to One Curve for All Purposes”
Different printing requirements call for different curves. You can select the appropriate curve based on the preset curves of Keditec according to the specific scenario:
- For printing on light-colored fabrics: Use the mode of “low white ink + high color ink saturation” (some Keditec models have a dedicated scene button for this). This ensures bright patterns while saving white ink.
- For printing on dark-colored fabrics: Switch to the curve of “high white ink coverage + color ink overlapping”. A thick enough white ink base ensures that the color ink printed on top appears bright and vivid.
- For printing small-sized fine patterns (such as phone cases and keychains): Use the curve of “low ink output + high precision” to prevent excessive ink from blurring the details.
- For printing large-sized patterns (such as back prints on T-shirts): Choose the curve of “uniform ink output + anti-smudging” to ensure consistent colors across the entire pattern and prevent blurry edges.
3.3 Manual Fine-Tuning Has Its Tricks; 3 Methods to Get It Done
If the original curve can’t meet special requirements (for example, a customer needs a pattern customized to a specific color card), you don’t need professional equipment. You can simply test-print and adjust by comparison. Remember these 3 tips:
- If the color is too dark: Increase the parameters of the “brightness channel” in the curve, or slightly increase the ink output of yellow ink and white ink to avoid overly concentrated color ink.
- If the color is too grayish: Lower the parameters of the “black channel”. In DTF printing, black ink is mainly used to deepen shadows; excessive black ink will make the overall color look gray.
- If the white ink fails to cover the base color: In the “white ink layer” settings of the curve, add one more base layer (but no more than 2 layers at most). Too many base layers will make the pattern too thick, which may cause it to peel off during transfer.
3.4 Curves Need Regular Calibration; Adjust When These Situations Occur
A curve isn’t a “set-it-and-forget-it” setting. You need to recalibrate it or ask Keditec’s technical support for help when the following situations arise:
- You switch to non-original ink or DTF film.
- The printer’s print head has been replaced or repaired.
- The weather suddenly becomes hot or cold (temperature affects ink viscosity).
- Color differences are found between batches during mass printing.
4. How to Troubleshoot Common Curve Problems? Novices Can Fix Issues Quickly

Even with the original curve, problems may still occur due to improper operation. Here are the solutions to 3 common high-frequency problems:
4.1 Printed Patterns Have Dull Colors and Lack Luster
- Possible causes: The curve is incompatible with the DTF film (e.g., using a curve for glossy film to print on matte film), or the color ink output is set too high, causing colors to pile up.
- Solution: Switch to the curve preset by Keditec that corresponds to the type of DTF film being used. Lower the “total ink volume limit” for color ink in the curve, usually from 100% to 85%-90%.
4.2 Uneven White Ink Base with “White Spots” or “Thick Lumps”
- Possible causes: The interval between white ink sprays in the curve is too short, or there is too little ink in the ink tank, leading to unstable ink supply pressure, which affects the implementation of curve parameters.
- Solution: In the “white ink settings” of the curve, adjust the ink spray interval from 5ms to 8ms. Ensure that the ink level in the ink tank is above the “minimum scale line”. If the problem persists, contact Keditec to check the ink supply system.
4.3 Slight Color Differences When Printing the Same Pattern Multiple Times
- Possible causes: The curve hasn’t been calibrated for a long time, resulting in slight wear of the print head; or significant changes in environmental humidity have affected the ink drying speed.
- Solution: Use the “color test page” function built into the Keditec printer to recalibrate the curve. Maintain the workshop humidity between 40%-60% during printing. Excessive humidity can cause ink to smudge, leading to inaccurate colors.
5. Conclusion: Understanding Curves Is the Key to Refining DTF Printing
The free curves provided by Keditec have indeed solved the “difficulty in getting started” problem for everyone. However, if you want to excel in the printing business, you still need to understand the core logic of curves. After all, with the same Keditec equipment and consumables, those who know how to adjust curves can make flexible adjustments according to customer needs, resulting in printed patterns that better meet customer expectations. In contrast, those who don’t understand curves may go through repeated trial and error, wasting both consumables and delaying orders.
Finally, remember these three core principles: prioritize the original curve and don’t randomly replace it with universal ones; adjust flexibly according to scenarios and consumables and don’t rigidly stick to one curve; conduct regular calibration and maintenance, and solve small problems in a timely manner. From “being able to use” curves to “using them well”, your DTF printing business will surely become more competitive.

